The dream of flying
...explore: From glider to motor-glider
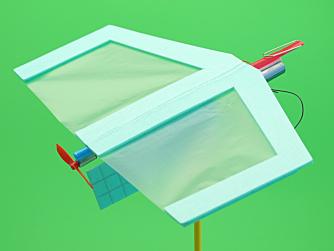
To motorise a wing is a big challenge. You will need to solve the same problems that a constructor comes across while building a motor-glider. The plane needs to be light and have good fying properties but also to be stable enough to carry an engine. The engine cannot be too big or too heavy, like in a real motor-glider, but still performant. The propeller is used for impulse but is a handicap for the aileron. We still try it out!
1

Build a motor-glider
The build is realised in 3 steps:
1. Building of the basic model
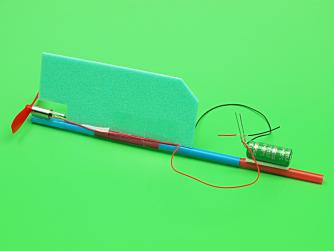
2. Building of the propulsion unit
3. Assembly of the model and the propulsion unit
2

1. Building of the basic model
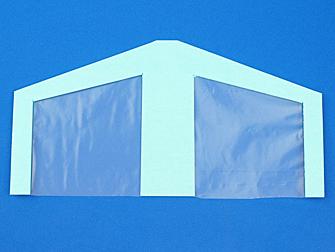
Build a basic model like explained for the glider.
3

2. Building of the propulsion unit
4
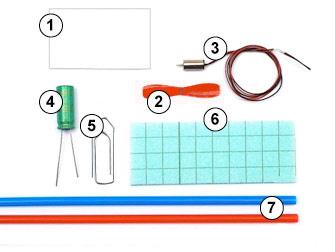
Material
1) Double-sided tape
2) Propeller
3) Mini electromotor with long wires
4) Condenser
5) Paper clip
6) Piece of thin expanded foam
7) Blue straw and red straw
Scissors, knife, adhesive tape, adhesive roller
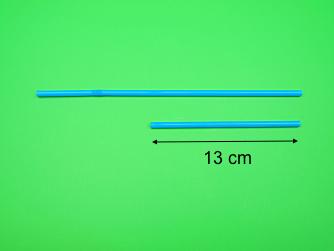
5
6
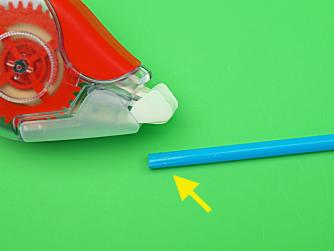
Glue one extremity with the dispenser (arrow).
7
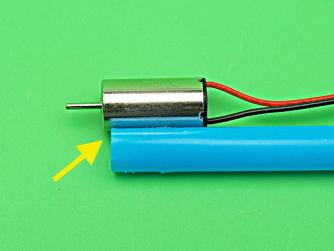
Glue the motor on the glued extremity.
The motor sticks out from the straw of 1 mm (arrow).
8
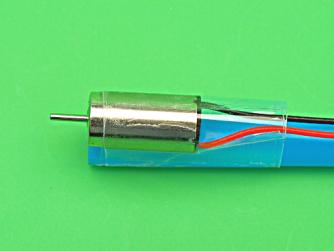
Secure the motor with some adhesive tape, parallel to the straw.
9
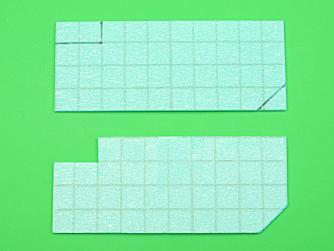
Cut out a piece of thin expanded foam: 4 squares width and 10 squares length (above).
Cut the plate like shown on the picture (under).
10
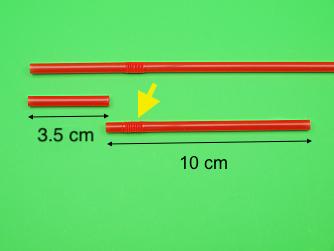
Cut from the tip, a piece of 3.5 cm length.
Cut the other piece, with the fold (arrow), at 10 cm.
Important: This piece absolutely needs the fold!
11
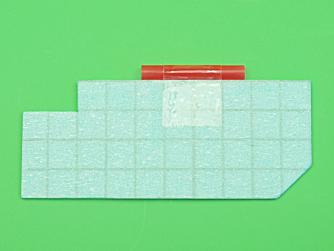
Fix the straw of 3.5 cm with some adhesive tape, like shown, onto the plate.
The straw is flush and parallel to the top edge of the plate.
12
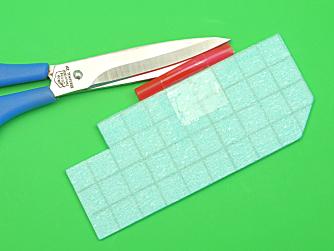
Cut the straw length wise.
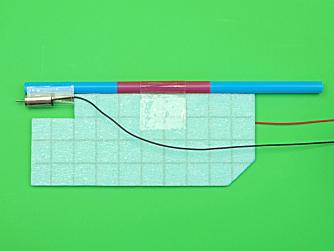
13
Put the red straw with plate over the blue straw (like shown on image).
The plate is near touching the adhesive tape.
The plate is aligned with the motor.
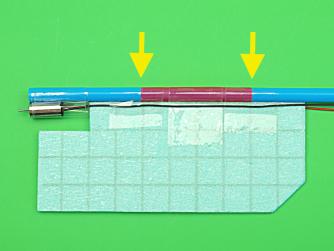
14
Secure the position of the plate on the blue straw with two bands of adhesive tape (arrow).
The two long cables can be fixed at the same time (like shown). It doesn’t matter where each colour goes.
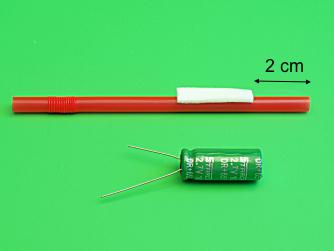
15
Cut a double-sided tape length wise.
Glue it 2 cm from the extremity of the straw.
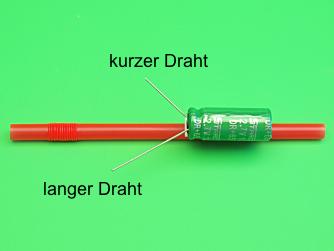
16
Glue the condenser on the straw (like on the image).
Secure it with some adhesive tape.
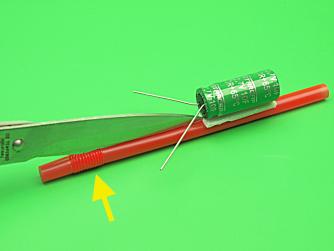
17
Cut the straw from the side where the fold is up to the condenser.
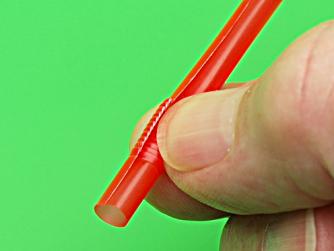
18
With your nail, make the sides slide one on top of the other.
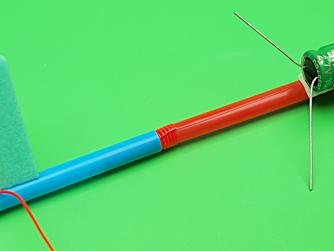
19
Insert the red straw, with the fold forwards, inside the blue one.
Careful that the straws don't fold! - The best is to do it on a smooth surface.
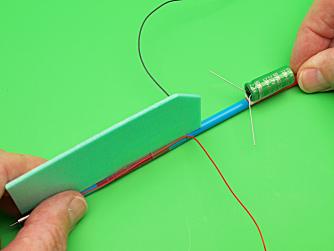
20
Insert the red straw inside the blue one, until the condenser.
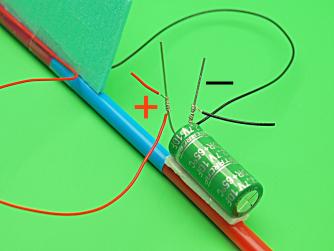
21
Link the red cable with the long wire of the condenser, the positive pole.
Link the black cable with the short wire of the condenser, the negative pole.
Careful: The links must be done exactly like shown on the picture.
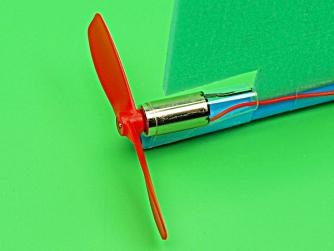
22
Install the propeller on the motor.
Careful: Look carefully! The propeller must be installed like on the picture: on the top half of the picture we see the front of the propeller, on the bottom half, the back of the propeller.
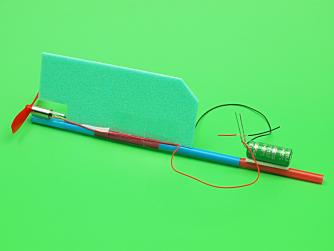
23
The propulsion unit is finished and ready to be assembled with the basic model.
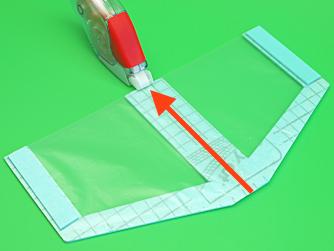
24
3. Assembly of basic model and propulsion unit
Lay out a line of adhesive tape in the middle, on the bottom side of the basic model (arrow).
The line goes from the front edge to the back one.
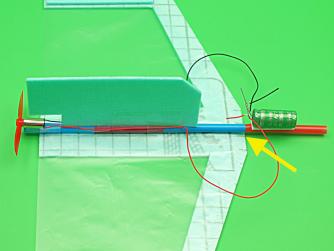
25
Glue the propulsion unit exactly in the middle of the propulsion unit.
The blue straw is aligned with the front edge of the basic model (arrow).
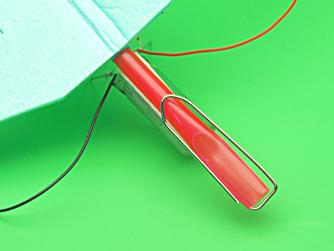
26
Insert a paper clip, like shown, in front, in the red straw.
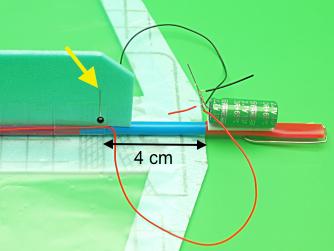
27
Find the centre of gravity of your motorglider.
Insert a pin in the propulsion unit plate, at 4 cm from the front edge of the basic model (arrow).
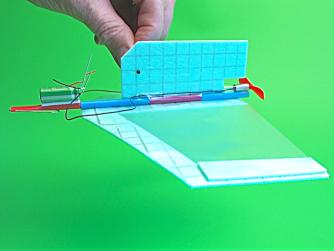
28
Lift slightly your plane by the pin.
The plane is balanced when the front part falls slightly down.
Specification: Bring your plane to the right position by moving the condenser forwards or removing the paper clip.
29
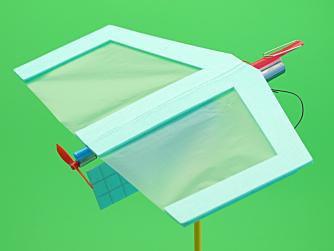
Well done, you have made it! Your motorglider is ready for its first fight!
30
Charging the condenser
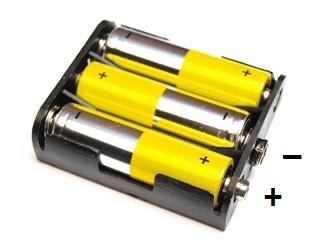
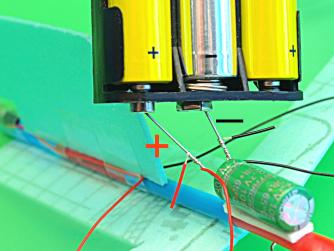
Verify once more where the positive pole (+) and negative pole (-) are on the condenser and where the plus (+) and minus (-) are on the battery box.
31
Link the condenser's and battery box's positive poles (+) and…
... Link the condenser's and battery box's negative poles (-) together.

32
Charge first for 3-5 seconds - then 7-10 seconds. Remove the battery box.
Hold your motor-glider in the air, level, at eyes level.
Give it a very, very slight forward push... ...and observe its fight!
Specification: The condenser must be recharged before each light. Only well charged batteries can supply enough energy for your plane!
33
Typical trajectories - cause and remedy
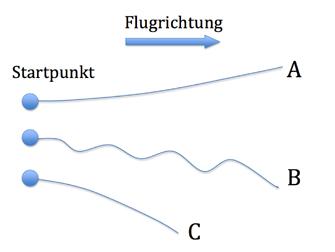
A: Soft ascent, straight or wide circles: Well done, you have done it all correct!
B: Wave light: Centre of gravity too far back. Move the propulsion unit to the front.
C1: Straight ahead-Nosedive: Centre of gravity too far forward. Move the propulsion unit to the back or remove the paper clip.
34
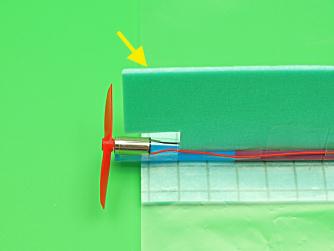
C2: Narrow circles - Descending light: The plane is overdriving sideways and goes into a vicious circle...
... Correct the fight trajectory by slightly folding the rudder (arrow).
The causes C1 and C2 could also occur at the same time.
Make all modifications step by step!
35
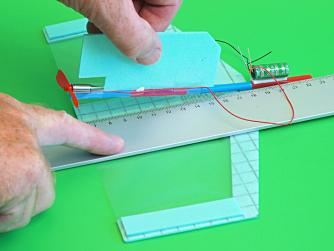
Remove propulsion unit from plane:
Lay the plane on a flat surface.
Lay a ruler on the wing, along the propulsion unit.
Lift up the propulsion unit gently while maintaining the ruler.
Careful to no fold anything.
| Views | |
|---|---|
| 47 | Total Views |
| 47 | Members Views |
| 0 | Public Views |
Share by mail
Please login to share this webpage by email.